What is Astro?
Astro is a high-performance framework designed to seamlessly merge the benefits of static and dynamic web development. It empowers developers to build modern websites using their preferred JavaScript frameworks while delivering lightning-fast loading times. With its unique “universal rendering” approach, Astro pre-renders pages into static HTML for optimal performance and security, while still enabling client-side interactivity. By leveraging partial hydration and other optimization techniques, Astro ensures efficient component loading and a superior user experience.
Recently, Astro has released version 3 with tons of improvements. I figure this is good timing to write some content for Astro and Angular since we’re going to use Astro to render our Angular components.
What is AnalogJS?
Analog is a fullstack meta-framework for building applications and websites with Angular. Additionally, Analog provides an Astro Integration that we can utilize to render Angular components in Astro.
What is Angular Three?
angular-three is a custom Angular Renderer to render THREE.js entities directly to the HTMLCanvasElement instead of the DOM.
Create an Astro application
Getting started with Astro is super easy because they provide a CLI tool to create a new Astro application
Open up the terminal and enter the following command
npm create astroFollow the prompts by create-astro. If you’re wondering, here’s mine
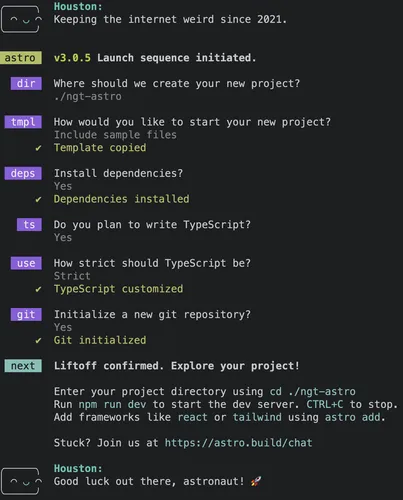 npm create astro prompts
Add AnalogJS integration
To add AnalogJS integration to Astro, run the following command
npx astro add @analogjs/astro-angularSay Yes to both questions and our Astro application is ready to render some Angular components
Add tsconfig.app.json
Although we have added the Astro integration, we need to create a tsconfig.app.json at the project’s root.
Start by creating tsconfig.app.json
touch tsconfig.app.jsonThen fill it out with the following content
{ "extends": "./tsconfig.json", "compileOnSave": false, "compilerOptions": { "baseUrl": "./", "outDir": "./dist/out-tsc", "forceConsistentCasingInFileNames": true, "strict": true, "noImplicitOverride": true, "noPropertyAccessFromIndexSignature": true, "noImplicitReturns": true, "noFallthroughCasesInSwitch": true, "sourceMap": true, "declaration": false, "downlevelIteration": true, "experimentalDecorators": true, "moduleResolution": "node", "importHelpers": true, "noEmit": false, "target": "es2022", "module": "es2022", "lib": ["es2022", "dom"], "skipLibCheck": true }, "angularCompilerOptions": { "enableI18nLegacyMessageIdFormat": false, "strictInjectionParameters": true, "strictInputAccessModifiers": true, "strictTemplates": true, "allowJs": false }, "files": [], "include": ["src/**/*.ts", "src/**/*.tsx"]}Add our first Angular component
Create a new file, Experience.ts, in src/components
You can use any file name for the component.
touch src/components/Experience.tsThen fill it out with the following boilerplate
import { Component } from "@angular/core";
@Component({ standalone: true, template: ` Hello Angular `,})export class Experience {}AnalogJS’s Astro integration requires components to be
standalone: true
To use this Experience component, open up src/pages/index.astro
Import Experience component
import Layout from '../layouts/Layout.astro';import Card from '../components/Card.astro';import { Experience } from '../components/Experience';Then render the component using the name of the component <Experience />
<h1>Welcome to <span class="text-gradient">Astro</span></h1><p class="instructions"> To get started, open the directory <code>src/pages</code> in your project.<br /> <strong>Code Challenge:</strong> Tweak the "Welcome to Astro" message above.</p>
<Experience />
<ul role="list" class="link-card-grid"> <!-- ... --></ul>Start our Astro application’s development server with the following command
npm run devThen go to http://localhost:4321 and we’ll see our Experience component is rendered 🎊
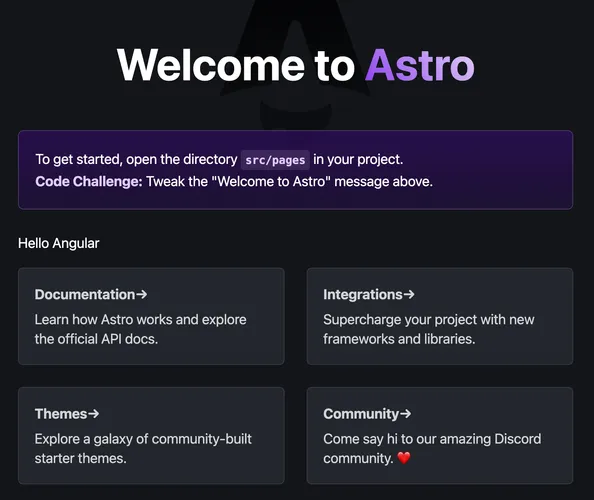 Astro home page with Angular component rendered
At this point, we can technically start writing blog posts with Astro and Angular
Add Angular Three
Open up the terminal so we can install a few things
npm install angular-three@beta three three-stdlibnpm install -D @types/threeWe might need to run
npm installwith--forceflag due to peer dependencies resolution
Let’s go back to Experience.ts and add the following code
import { CUSTOM_ELEMENTS_SCHEMA, Component } from "@angular/core";import { NgtCanvas } from "angular-three";
@Component({ standalone: true, template: ``, schemas: [CUSTOM_ELEMENTS_SCHEMA],})class Scene {}
@Component({ standalone: true, template: ` <ngt-canvas [sceneGraph]="scene" /> `, imports: [NgtCanvas],})export class Experience { scene = Scene;}You can also break up
Sceneinto a separate file
Since Three.js is a Canvas-base library (i.e: WebGL), we want
to enable client-side JavaScript for our Experience component. Astro allows us to do so by using client:load directive on
our component. So, let’s go back to src/pages/index.astro and make the following change
<Experience /><Experience client:load />Additionally, we also need to update astro.config.mjs with the following change:
export default defineConfig({ integrations: [analogjsangular()], vite: { ssr: { noExternal: ["angular-three", "three", "ngx-resize"], }, },});If you do not care about SSR, you can skip the config change and use
client:onlyinstead ofclient:load. This makesExperiencecomponent to only ever load on the client.
Make sure there is no error from our development server as well as in the browser’s console. Now, we are ready to render some 3D objects
Add our cube
Angular Three is a Custom Renderer. Hence, we need to teach it how to render tags that we put on the template, like how Angular knows
how to render <div> into an HTMLDivElement on the DOM.
To do so, we’ll use extend() API from angular-three to expand the internal catalogue of Angular Three
import { NgtCanvas } from "angular-three";import { NgtCanvas, extend } from "angular-three";import { Mesh, MeshBasicMaterial, BoxGeometry } from "three";
extend({ Mesh, MeshBasicMaterial, BoxGeometry });Here, we are teaching Angular Three how to render a THREE.Mesh, a THREE.MeshBasicMaterial, and a THREE.BoxGeometry
@Component({ standalone: true, template: ` <ngt-mesh> <ngt-box-geometry /> <ngt-mesh-basic-material color="hotpink" /> </ngt-mesh> `, schemas: [CUSTOM_ELEMENTS_SCHEMA],})class Scene {}Notice how we use ngt-* to render our 3D objects. extend() turns what we pass in into a catalogue of HTML Custom Element tags prefixed with ngt-
followed by the name of the entity in kebab-case. This is also the reason why we need CUSTOM_ELEMENTS_SCHEMA.
Now, our Astro application renders a pink “box”
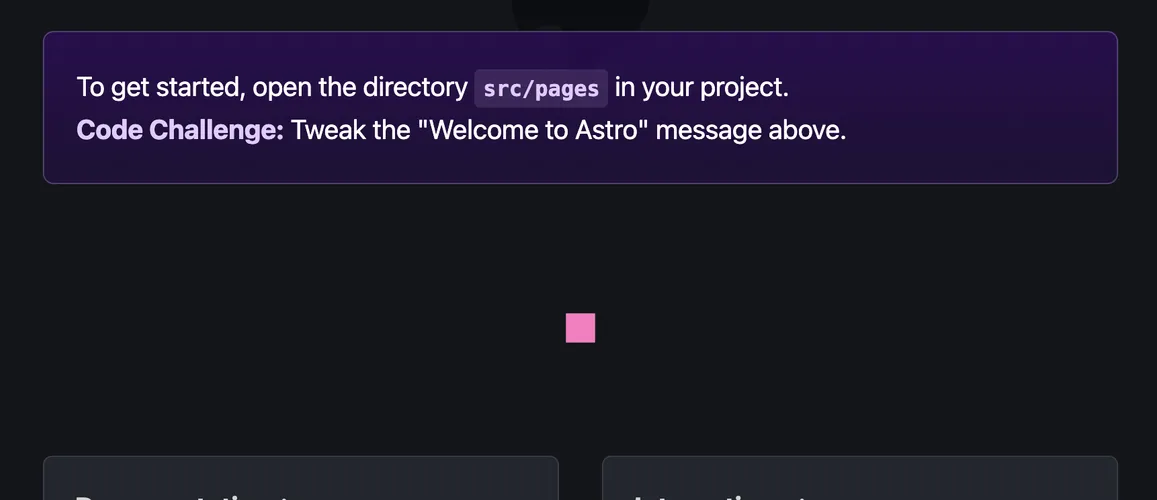 Astro home page a pink box
Increase the Canvas area
Our canvas is a little too small. This is because of two reasons:
- Canvas default height is
150pxper spec - Our
Experience’s parent element doesn’t have aheightset
NgtCanvas component is designed to take on the parent’s dimensions. Hence, we can control our canvas’ sizes by wrapping <Experience /> with
a container with a specified height
<div style="height: 600px"> <Experience client:load /></div>The canvas will take up 600px and our pink box will be more visible.
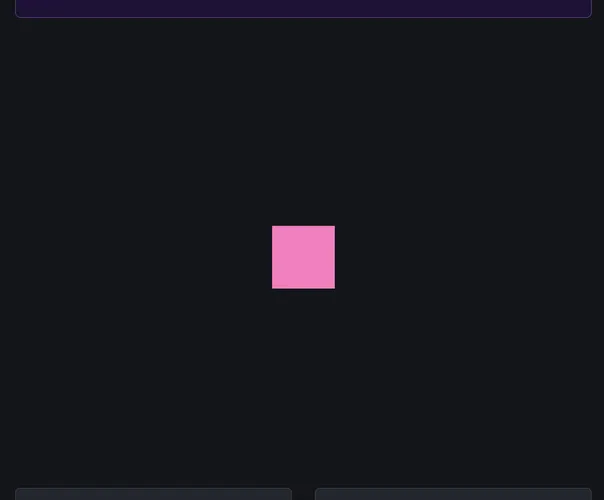 Astro home page a pink box on a large canvas
Animate the box
To animate our box, we can use (beforeRender) output on <ngt-mesh>
import { NgtCanvas, extend } from "angular-three"; import { NgtCanvas, extend, type NgtBeforeRenderEvent } from "angular-three";
@Component({ standalone: true, template: ` <ngt-mesh> <ngt-mesh (beforeRender)="onBeforeRender($event)"> <ngt-box-geometry /> <ngt-mesh-basic-material color="hotpink" /> </ngt-mesh> `, schemas: [CUSTOM_ELEMENTS_SCHEMA],})class Scene { onBeforeRender({ object, state }: NgtBeforeRenderEvent<THREE.Mesh>) { object.rotation.x += state.delta; object.rotation.y += state.delta; }}(beforeRender) allows our objects to participate in the animation loop that Angular Three creates to render the Scene Graph.
This function runs outside of Angular Zone (i.e: outside of Angular Change Detection mechanism) to maintain high FPS. It is good practice
to NOT update states in this function.
- The
stateobject contains useful information about Angular Three internals likedelta,clock, the defaultTHREE.Scene, the defaultTHREE.Camera, and more. - The
objectis the instance of the 3D object that Angular Three renders. In this case, it is theTHREE.Meshinstance fromngt-mesh
 A rotating pink box
Let there be lights
At the moment, our “box” looks bland. In fact, we can’t even tell if it’s a box. The reason is we’re using MeshBasicMaterial
for our box and MeshBasicMaterial does not reflect lights. Let’s switch to MeshStandardMaterial, a material that can reflect lights.
import { BoxGeometry, Mesh, MeshBasicMaterial } from "three";import { BoxGeometry, Mesh, MeshStandardMaterial } from "three";
extend({ Mesh, MeshBasicMaterial, BoxGeometry });extend({ Mesh, MeshStandardMaterial, BoxGeometry });Then we can update our template
<ngt-mesh (beforeRender)="onBeforeRender($event)"> <ngt-box-geometry /> <ngt-mesh-basic-material color="hotpink" /> <ngt-mesh-standard-material color="hotpink" /></ngt-mesh>But wait, our box is now pitch black.
 A 'black' box
We haven’t added any lights yet. Imagine a dark room, there is no light that our box can reflect on. Let’s add some lights
import { AmbientLight, BoxGeometry, DirectionalLight, Mesh, MeshStandardMaterial,} from "three";
extend({ Mesh, MeshStandardMaterial, BoxGeometry, AmbientLight, DirectionalLight,});Next, let’s update our template to render those lights
@Component({ standalone: true, template: ` <ngt-ambient-light [intensity]="Math.PI" /> <ngt-directional-light [intensity]="Math.PI" />
<ngt-mesh (beforeRender)="onBeforeRender($event)"> <ngt-box-geometry /> <ngt-mesh-standard-material color="hotpink" /> </ngt-mesh> `, schemas: [CUSTOM_ELEMENTS_SCHEMA],})class Scene { Math = Math;
onBeforeRender({ object, state }: NgtBeforeRenderEvent<THREE.Mesh>) { object.rotation.x += state.delta; object.rotation.y += state.delta; }}Voila! Now our box looks so much better, with dimensionality, like a real box.
 A 'real' rotating pink box
Take control of the camera
Who hasn’t tried to “grab” the scene and rotate it around? Well, we can’t with what we currently have because
our camera is static. However, we will be able to control our camera with the help of OrbitControls
Let’s teach Angular Three how to render OrbitControls
import { OrbitControls } from "three-stdlib";
extend({ Mesh, MeshStandardMaterial, BoxGeometry, AmbientLight, DirectionalLight, OrbitControls,});Next, let’s adjust our Scene component to render OrbitControls
import { NgtCanvas, extend, type NgtBeforeRenderEvent, injectNgtStore, NgtArgs,} from "angular-three";
@Component({ standalone: true, template: ` <ngt-ambient-light [intensity]="Math.PI" /> <ngt-directional-light [intensity]="Math.PI" />
<ngt-mesh (beforeRender)="onBeforeRender($event)"> <ngt-box-geometry /> <ngt-mesh-standard-material color="hotpink" /> </ngt-mesh>
<ngt-orbit-controls *args="[camera(), domElement()]" /> `, imports: [NgtArgs], schemas: [CUSTOM_ELEMENTS_SCHEMA],})class Scene { Math = Math;
private store = injectNgtStore(); camera = this.store.select("camera"); domElement = this.store.select("gl", "domElement");
onBeforeRender({ object, state }: NgtBeforeRenderEvent<THREE.Mesh>) { object.rotation.x += state.delta; object.rotation.y += state.delta; }}- We import
injectNgtStoreandNgtArgsfromangular-three - We add
NgtArgstoimportsarray to make*argsdirective available to our template - We call
injectNgtStoreto grab the internal Angular Three store object via DIcamerais the default camera.this.store.select()returns a SignaldomElementis the DOM element from theWebGLRenderer.this.store.select()accepts multiple arguments to select nested objects.
- We render
ngt-orbit-controlsand passcamera()along withdomElement()to*args- This is equivalent to
new OrbitControls(camera, domElement)
- This is equivalent to
Back to our running application and BOOM 💥, we can grab the scene, rotate it around, and zoom in/out
 Controlling the camera with OrbitControls
Conclusion
Astro is truly a magnificient technology. It is light-weight, wicked fast, and easy to integrate with other frameworks. On the other hand, I cannot praise AnalogJS enough for what it enables for Angular developers. In this blog post, we learn how to use AnalogJS to bring Angular components to Astro land with an example of rendering a 3D box using Angular Three.
Give Astro, AnalogJS, and Angular each a star if you haven’t. I hope you have fun with all the technologies that we talk about in this blog post. See you in the next one.